Handwritten Digits Classifier
The project was born with the aims of:
- Becoming familiar with the Tensorflow framework;
- Building a basic code structure that allows me to try several neural networks (also for other projects/applications) just by implementing a simple interface (some function definition in each module).
Dataset
The first part of the project consisted in providing a dataset for:
- Training, testing and validation of the model;
- Prediction of the handwritten digits.
For the first point, the famous public MNIST dataset was used because of the variety of labelled inputs and because of the ease fo usage within Tensorflow.
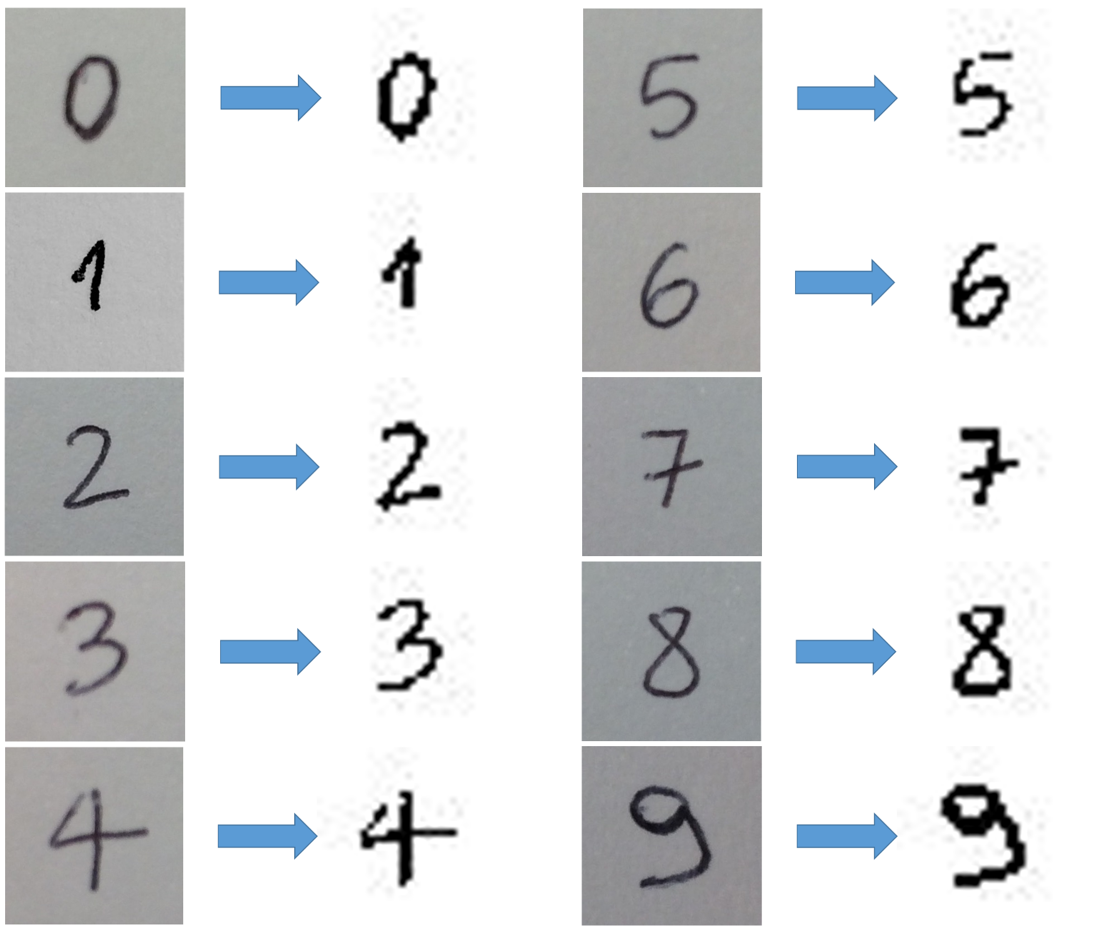
For the second point, some code was implemented for an end-to-end automatic acquisition of labelled pictures: taking a picture with an iPhone, some Python code receives it with the labels, resized every image into 28×28 PNG file and packs everything into a standardised dataset file (pickled dictionary). The results of the tool are shown in the image below.
Code Architecture
The architecture of the Python code is made for allowing the modularity of the neural networks. The image below shows the structure.
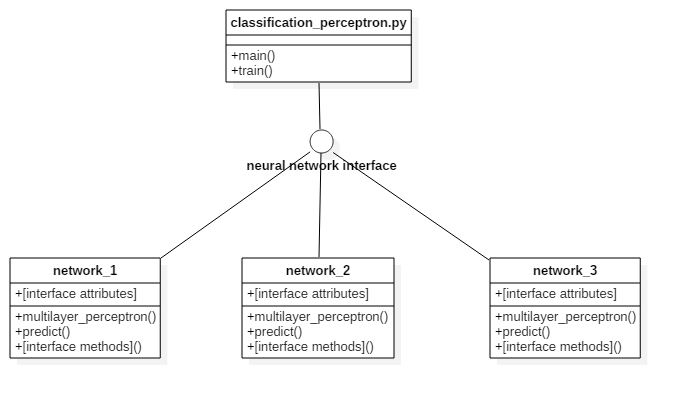
The main module (“classification_perceptron.py”) implements two functions:
- A train function that takes the selected neural network and makes the training;
- A main function that, instead, makes predictions after training finished and exports the results as PNG images.
By changing an integer variable in the main module, the related neural network is selected and processed.
Training methods
For training the network there were several options. The standard Stochastic Gradient Descent (SGD) is the simplest to implement, but also the slowest to converge. In my own machine learning library the implemented method is the SGD, in this project I decided to use the Adam Optimiser because of the quick convergence. In the following images (taken from Sebastian Ruder blog), it’s really clear the difference.

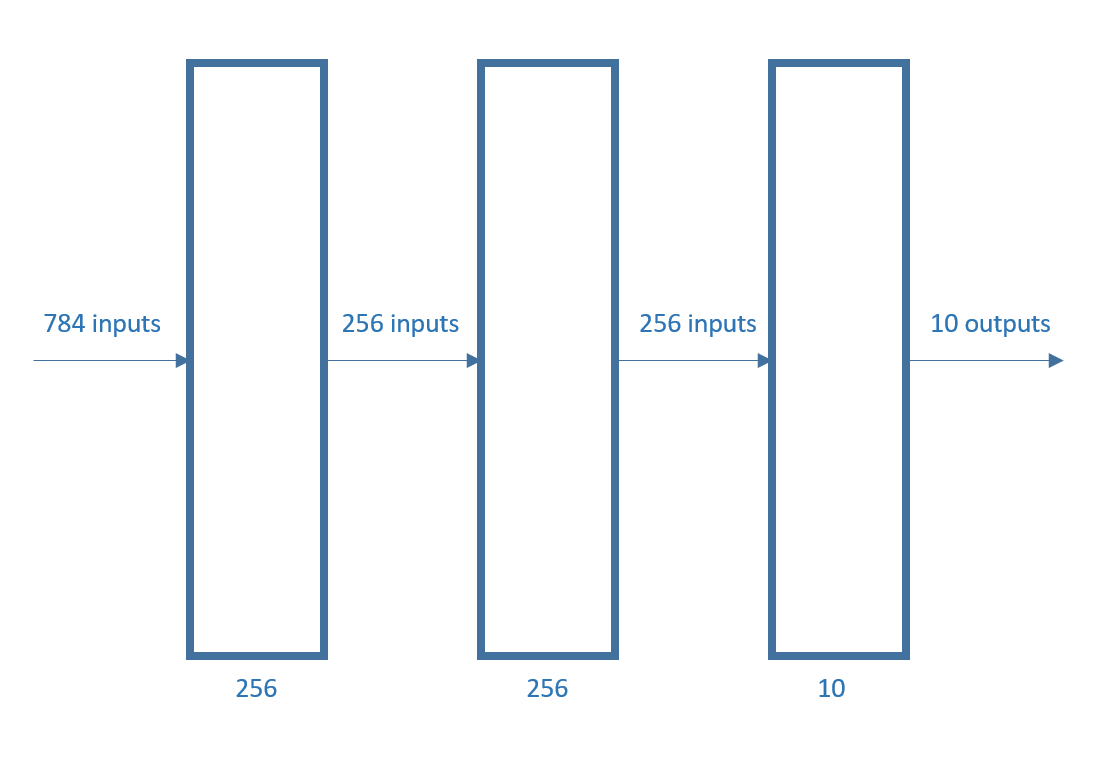
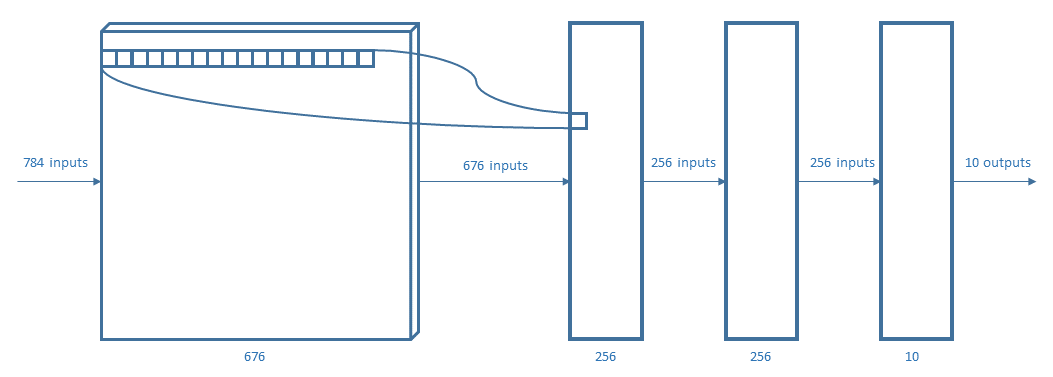
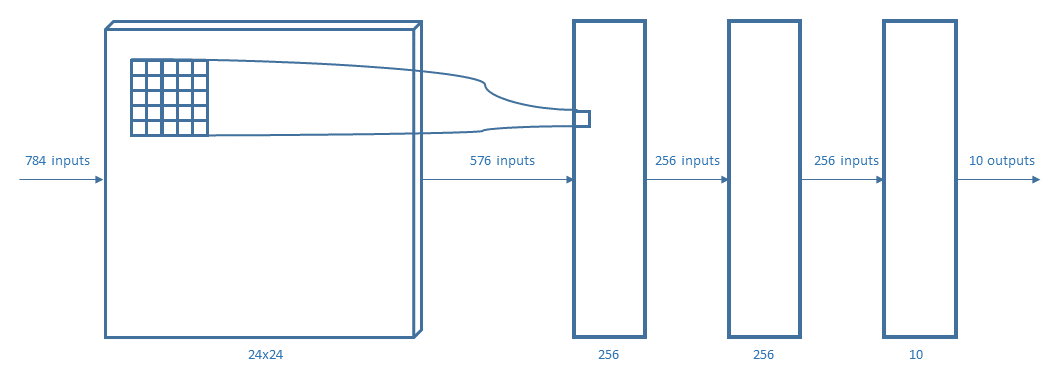
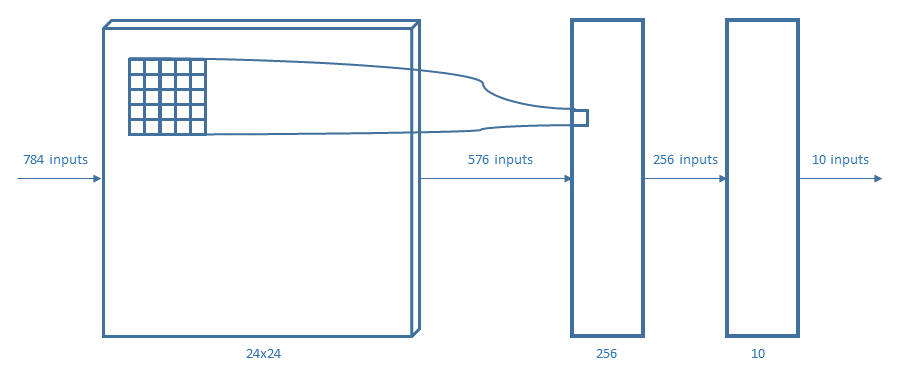
Neural Networks
The test was implemented with four different neural networks. Every layer used a Rectified Linear Unit (ReLU) except for the output layer that used a softmax function.
The perceptrons used are:

For representing the considered neural networks, the same notation of AlexNet (figure above) will be used.
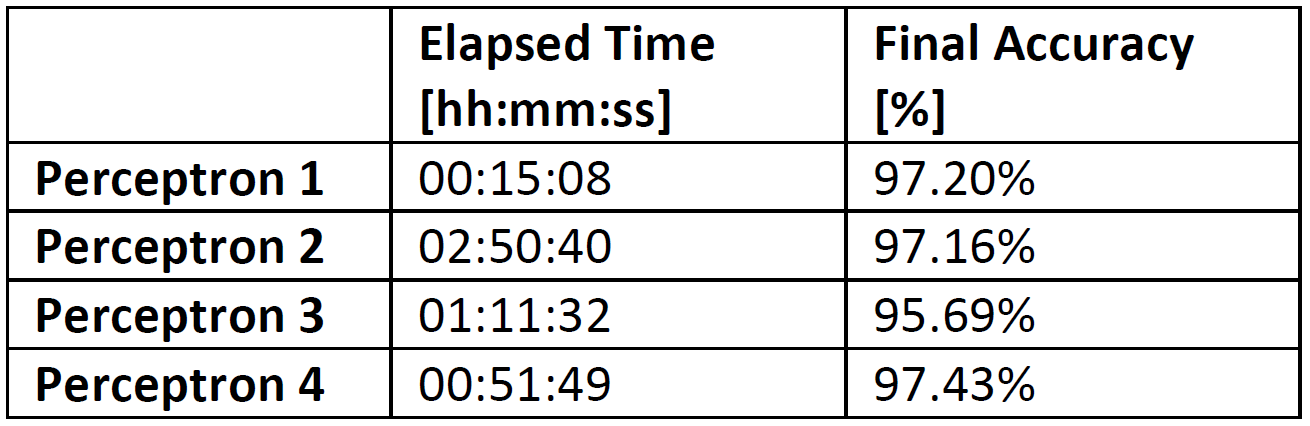
Results
In the first place, I proceeded with the training of the networks. The standard working operation was to make 200 epochs and register both the elapsed time and the attained accuracy. The results are resumed in the following table:
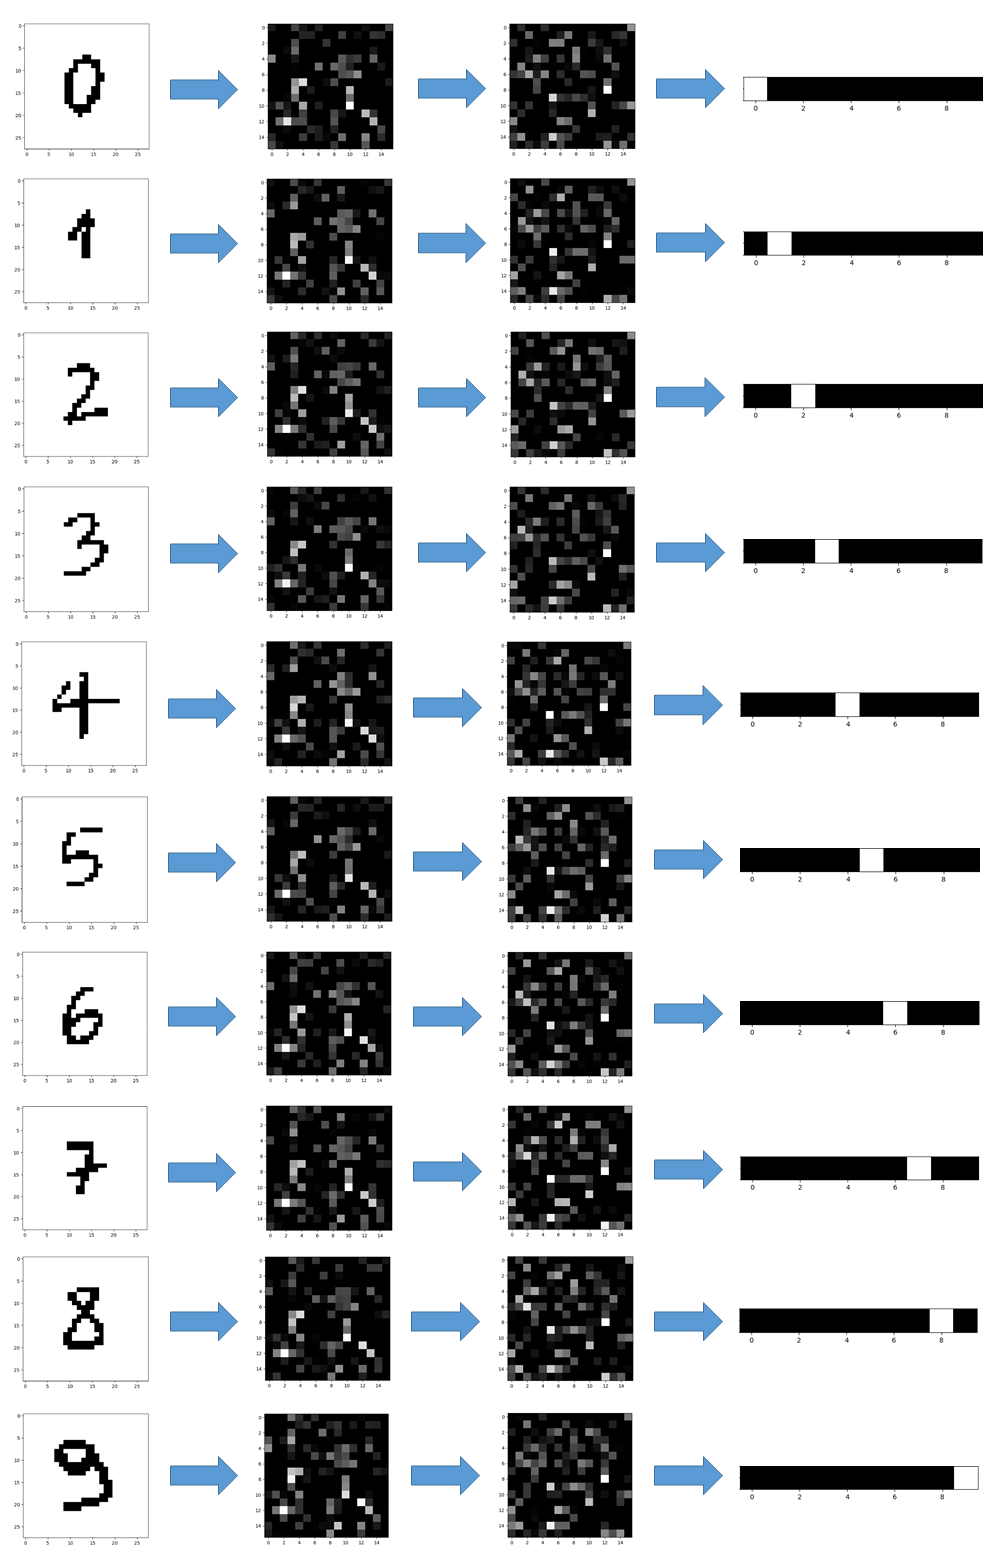
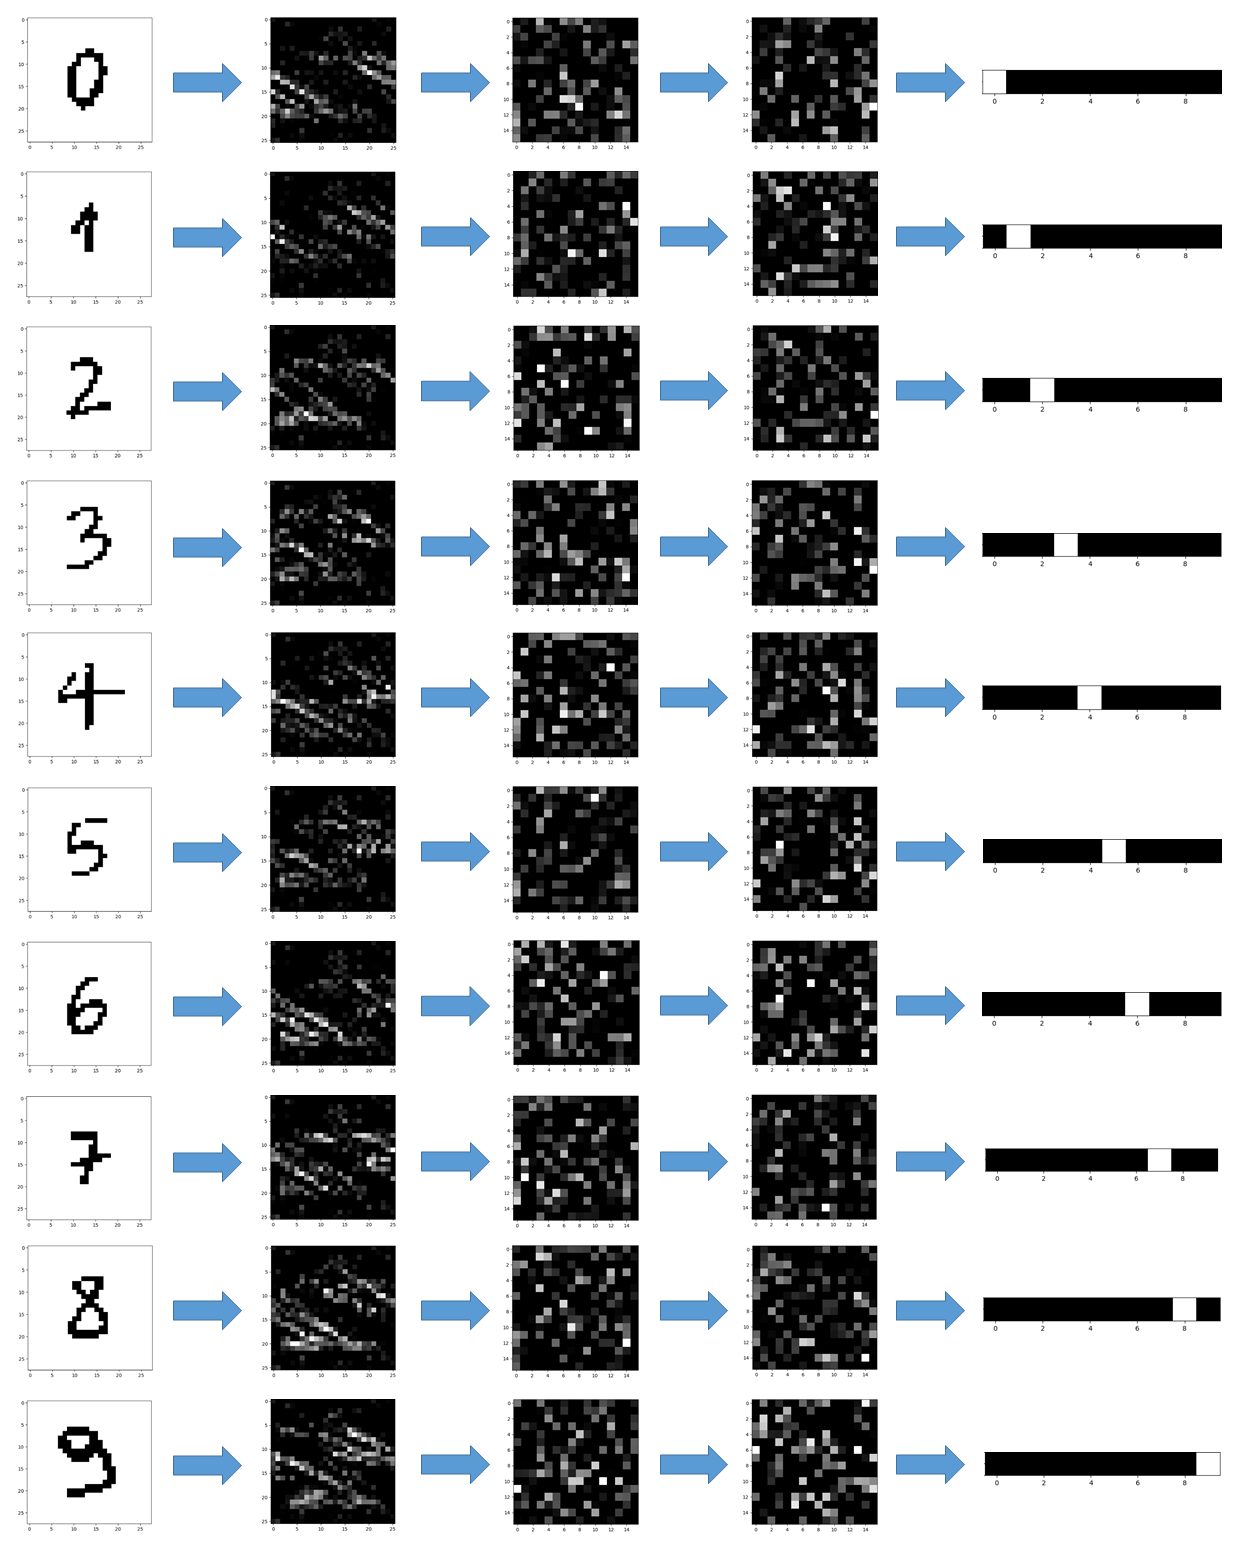
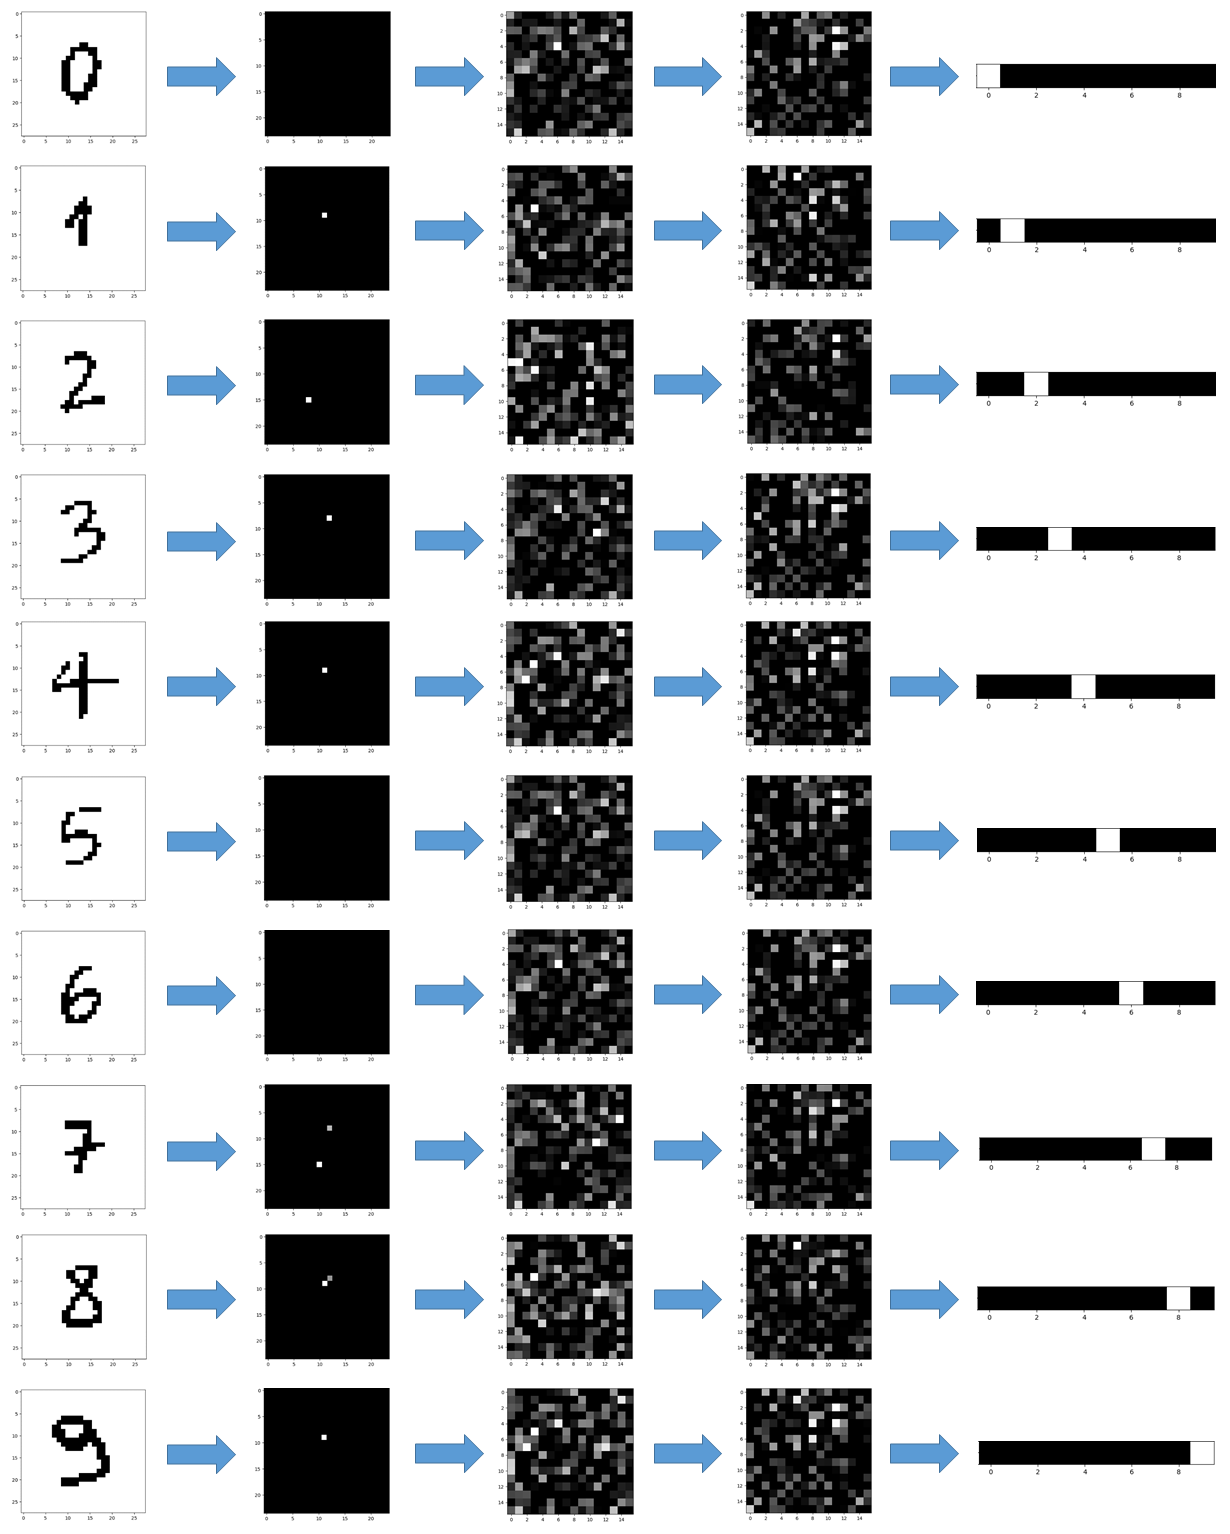
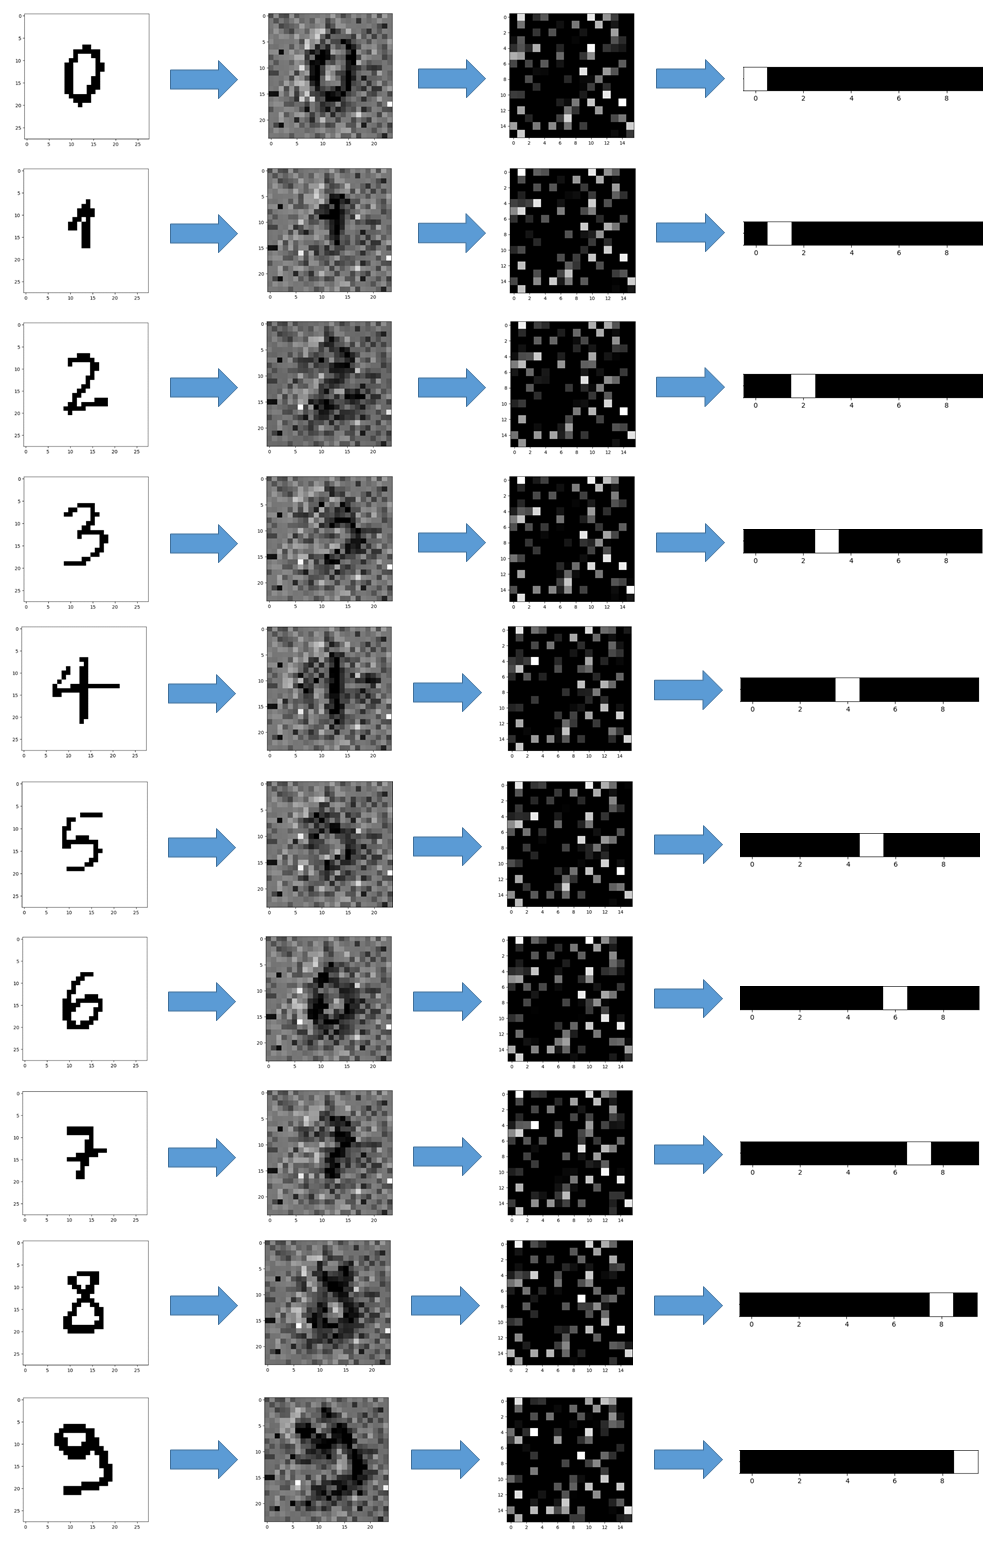
Therefore, I used the trained networks for predicting some pictures I took and preprocessed (see above). The results, showed in the pictures below, were taken at every stage of the neural networks.
Conclusions
The outcome of the training was quite satisfying, except for perceptron 3 which probably had troubles with overfitting. In general, the code and the experience made with this small insignificant project are going to be a solid base on top of which I’ll build something more complex in near future.